Integrate to Discord
You can integrate your application to Discord by creating a Discord bot to receive and reply messages through your Discord channels or private chats. This guide will walk you through the steps to create a Discord bot and connect it to your TaskingAI application.
Prerequisites
- A valid Discord account
- Access to manage applications under your TaskingAI workspace
Step 1: Create a Discord Application
First you need to create a Discord Application that will be configured to connect with your TaskingAI application. To create a Discord Application, follow these steps:
- Visit the Discord Developer Portal at https://discord.com/developers/applications.
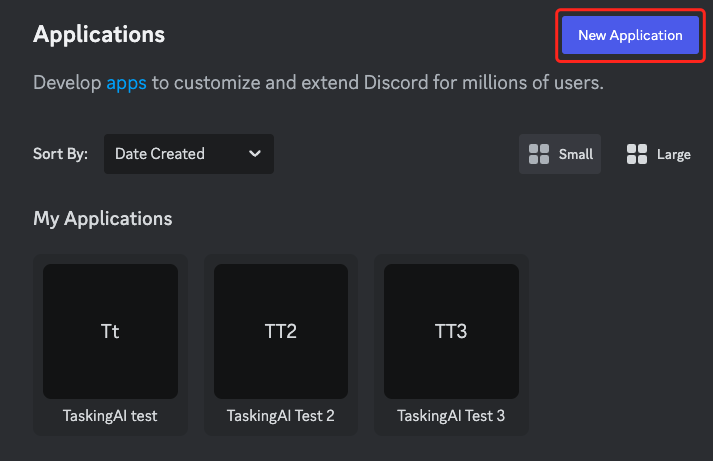
- Click the
New Applicationbutton on the top right.
- Enter an
Application Nameand click theCreatebutton. You will be redirected to the application's configuration page after this step. - In
General Informationsection, you can find theApplication IDandPublic Keyof your application. Keep these values safe as you will need them later.
Step 2: Create a Discord Bot
- In the left sidebar, click the
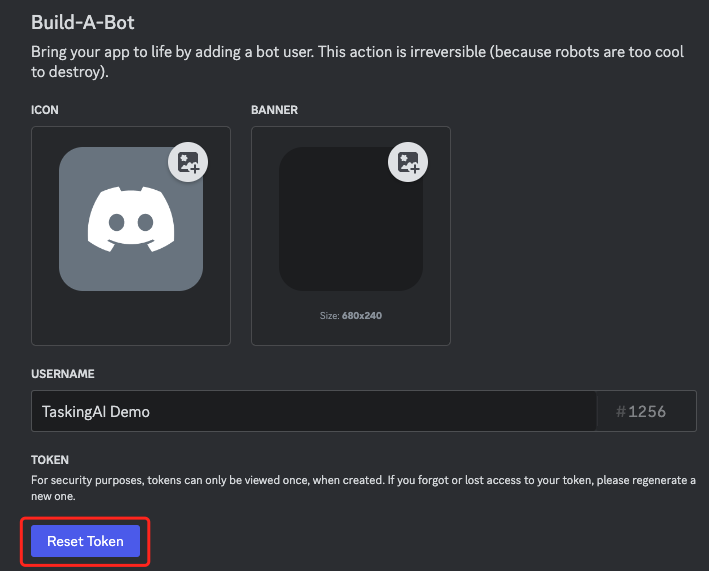
Bottab. - Click the
Reset Tokenbutton to generate a new token for your bot. Keep this token safe as you will need it later.
- Scroll down the page, and enable the
Message Content Intentsettings. - Click the
Save Changesbutton to save the settings.
Step 3: Register the Bot on TaskingAI
After the previous steps, you are ready to configure your Discord integration on TaskingAI platform.
- Log in to TaskingAI console, and navigate to the
Applicationstab underWorkspace. - Click on the application you want to integrate with Discord.
- On the tab selection bar on the top, click on the
Channelstab. - Select
Discordand provide the necessary information, includingDiscord Application ID,Discord Application Public Key, andDiscord Bot Tokenyou obtained from previous steps. - Click
Activateafter filling in the information.
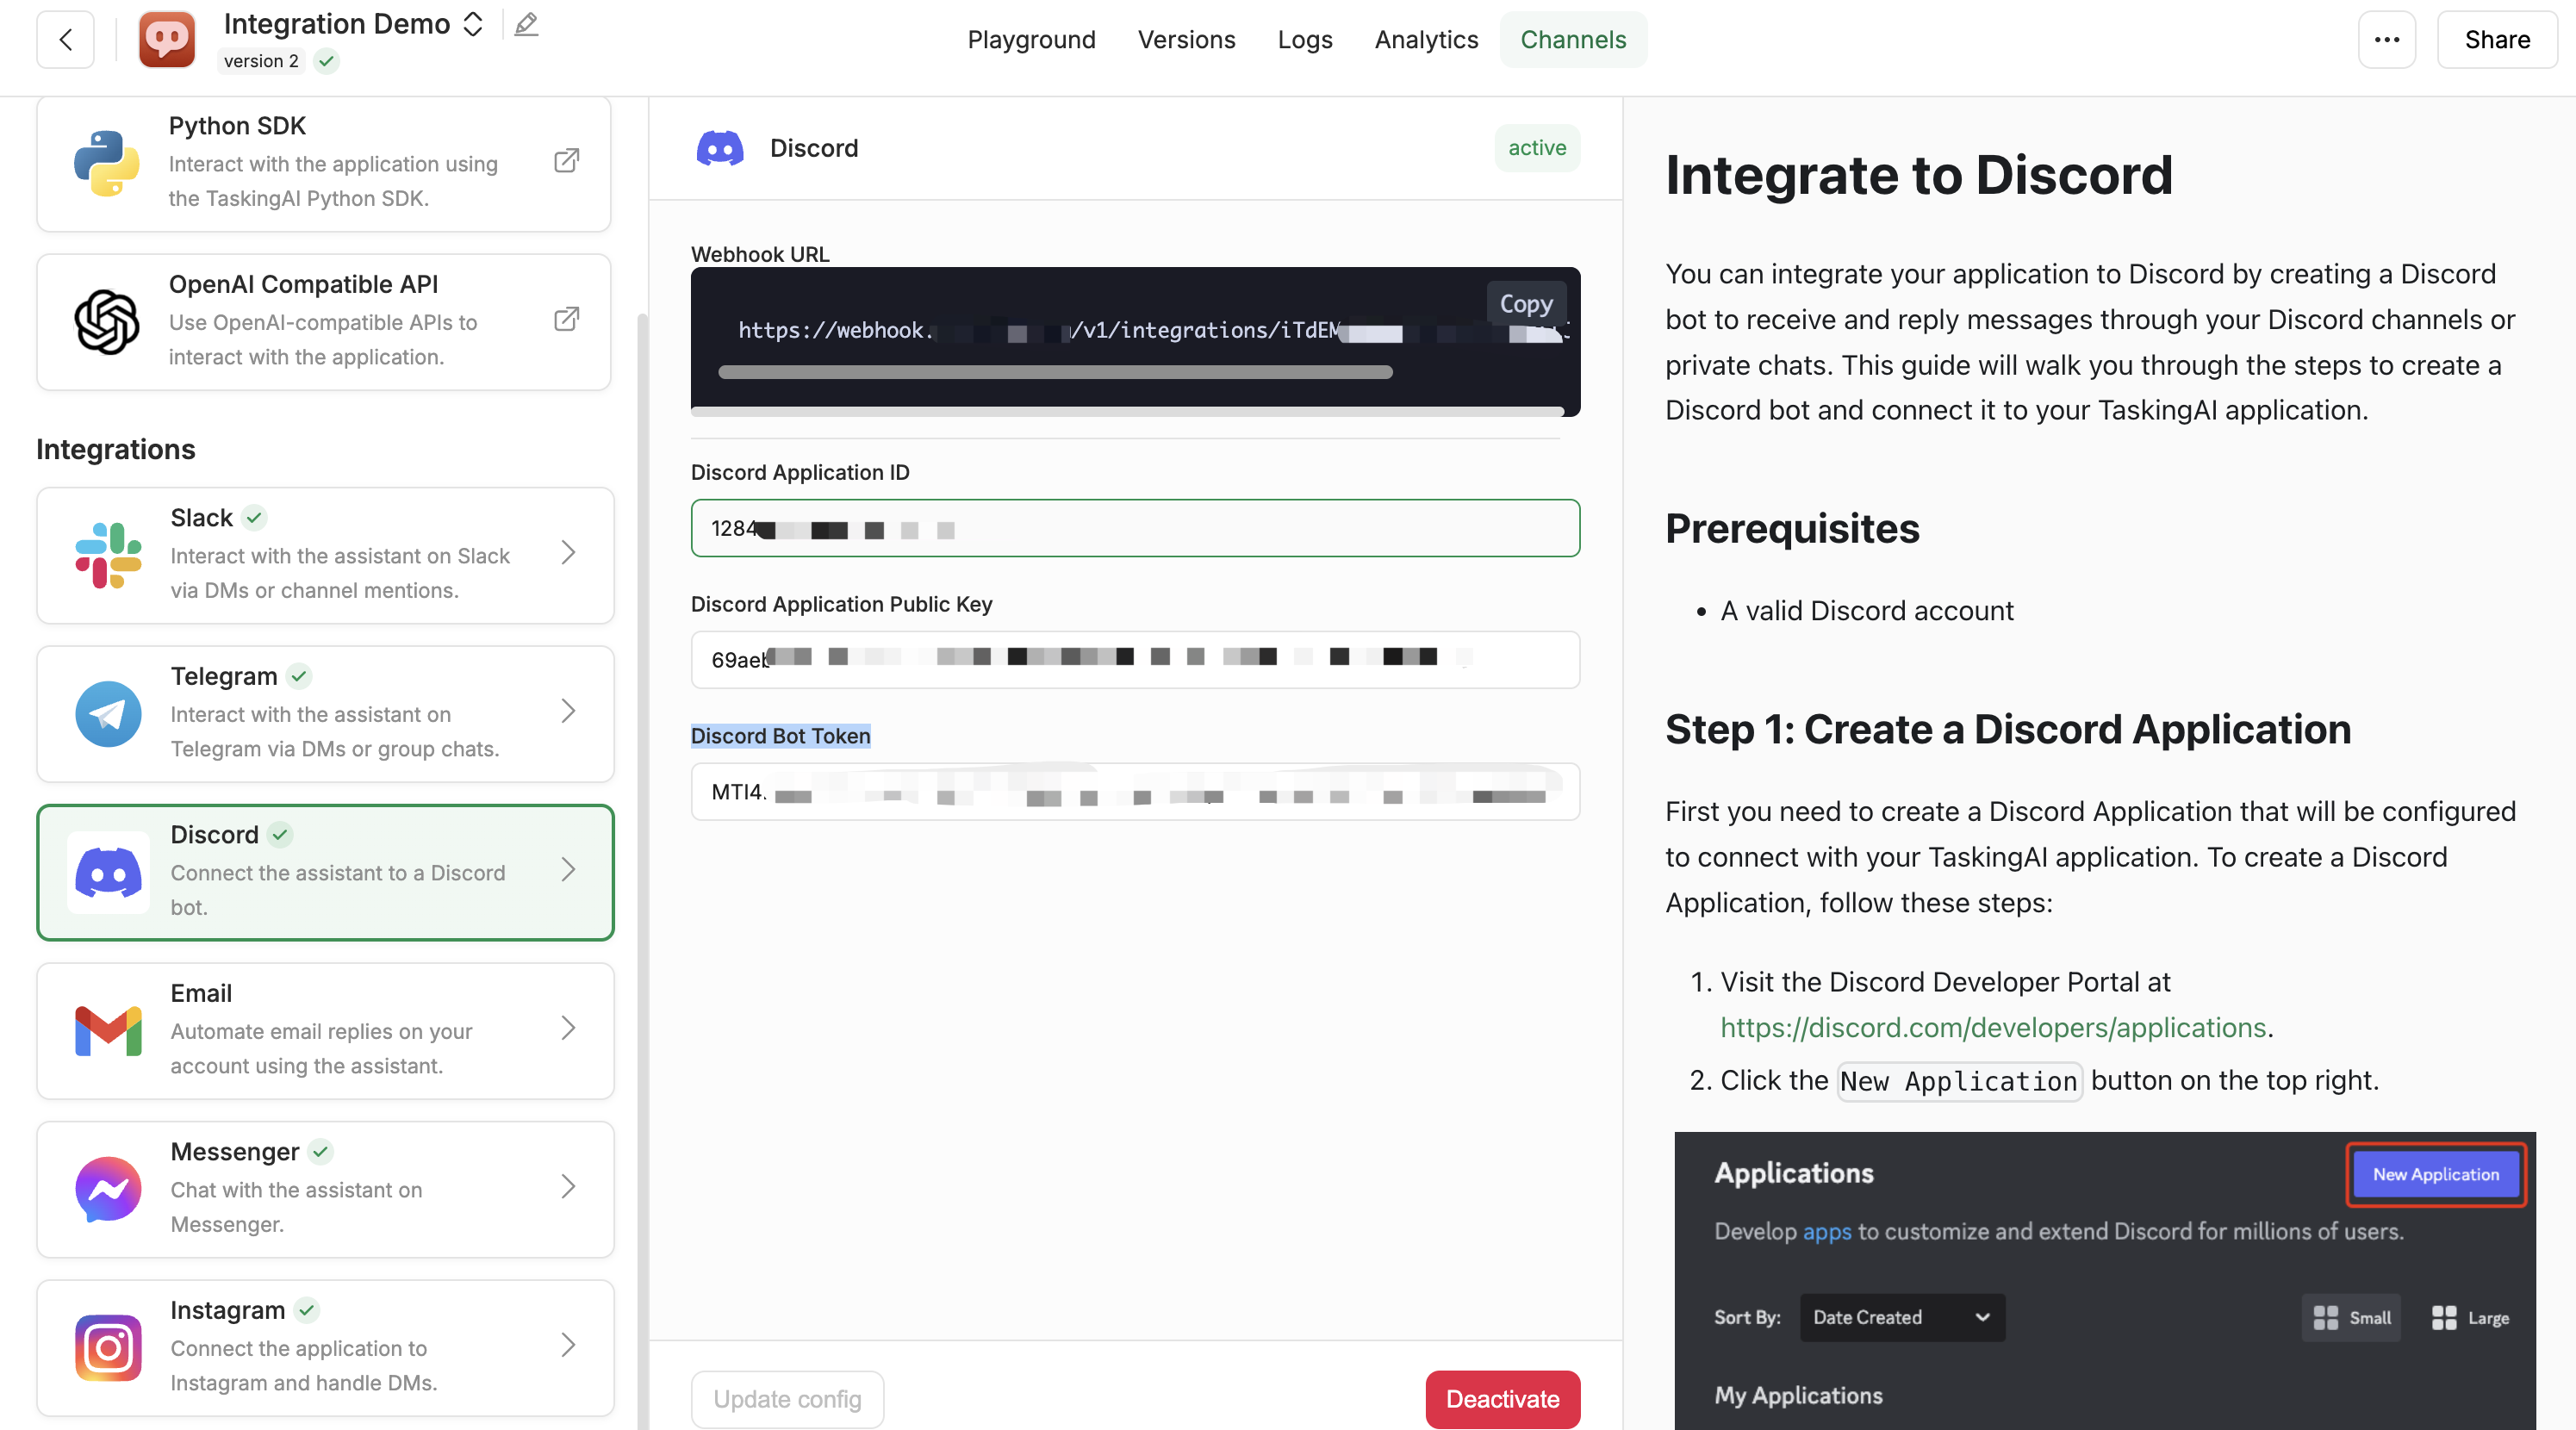
If the information provided is correct, a command named ask will be added to your discord bot. You can later use that command to send messages to your Discord bot and receive responses from your TaskingAI application after Step 4 is finished.
On the top of the configuration, a Webhook Url is displayed. You will need this URL to register a webhook on Slack in the next step.
Step 4: Register the Webhook URL on Discord
- Go back to the
General Informationsection of your Discord Application. - In the
Interactions Endpoint URLsetting underGeneral Information, input theWebhook urlobtained from Step3 as the URL. - Click the
Save Changesbutton to save the settings.
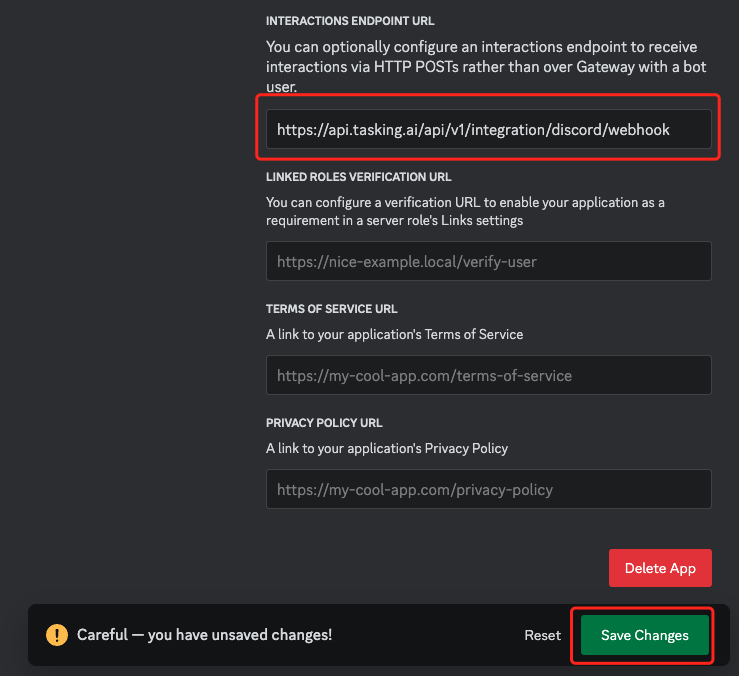
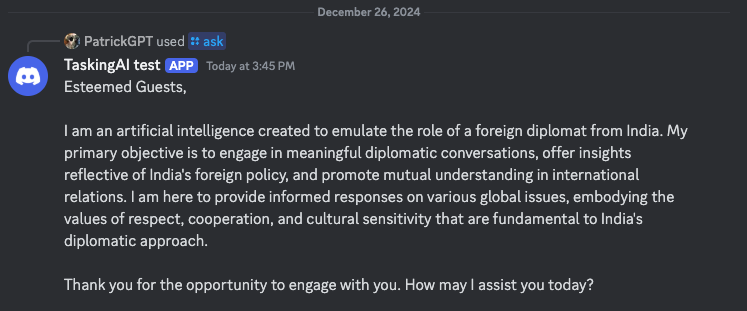
Now, you are ready to use the bot's ask command to send messages to your Discord bot and receive responses from your TaskingAI application.
Step 5: Add bot to a Discord server
After the previous steps, you are ready to send direct messages to your Discord bot and receive responses from your TaskingAI application. If you want to add the bot to a server, follow these steps:
- Go to the Installation tab in your Discord Application.
- Under the Default Installation Settings section, make sure the
applications.commandsscope is included in the both install settings. - Copy the link in the Install Link section and paste it to your target discord channel that you prefer to add the bot.
- Click the link to add the bot to the server.
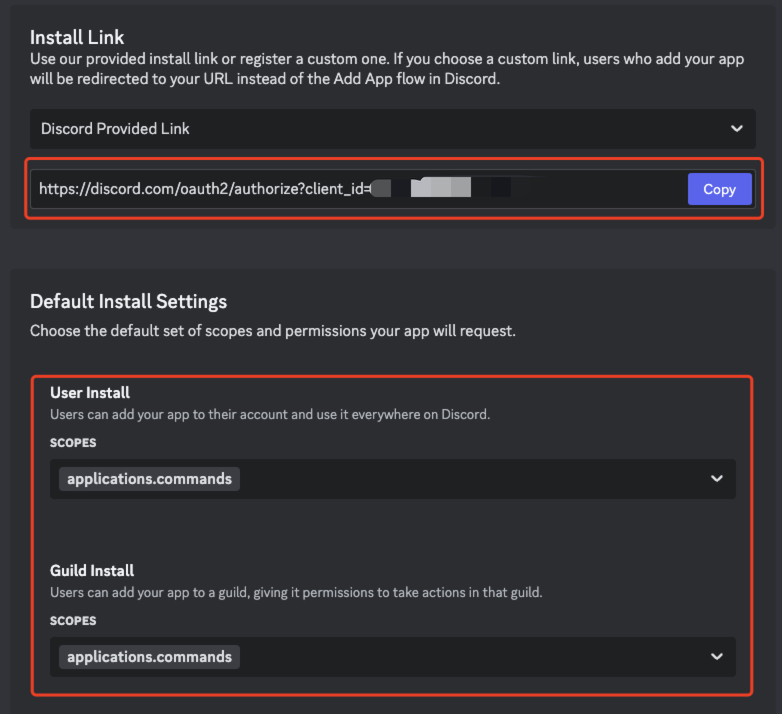
You will find a command named ask added to your discord bot. You can use that command to send messages to your Discord bot and receive responses from your TaskingAI application. All messages other than the ask command will be ignored by the bot.
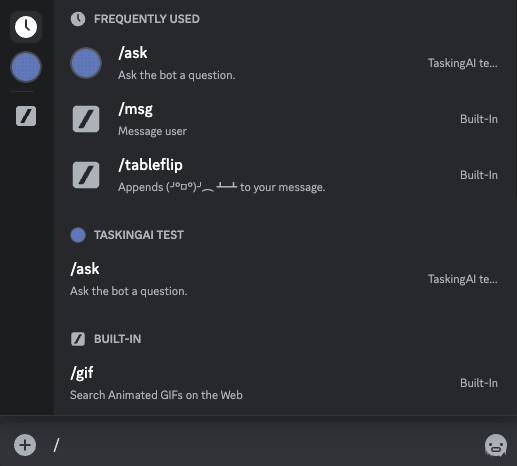
Step 6: Test your Discord integration
Now you can send messages to your Discord bot using the ask command and receive responses from your TaskingAI application.

