Integrate to Slack
You can integrate your application to Slack to receive and send messages in your Slack channels. After finishing this guide, you will have a Slack bot that will answer to messages with the responses generated by your application.
Prerequisites
- A Slack account with a created workspace
- Access to manage applications under your TaskingAI workspace
Step 1: Create a Slack App
First you need to create a Slack app that will be configured to be your bot. To create a Slack app, follow these steps:
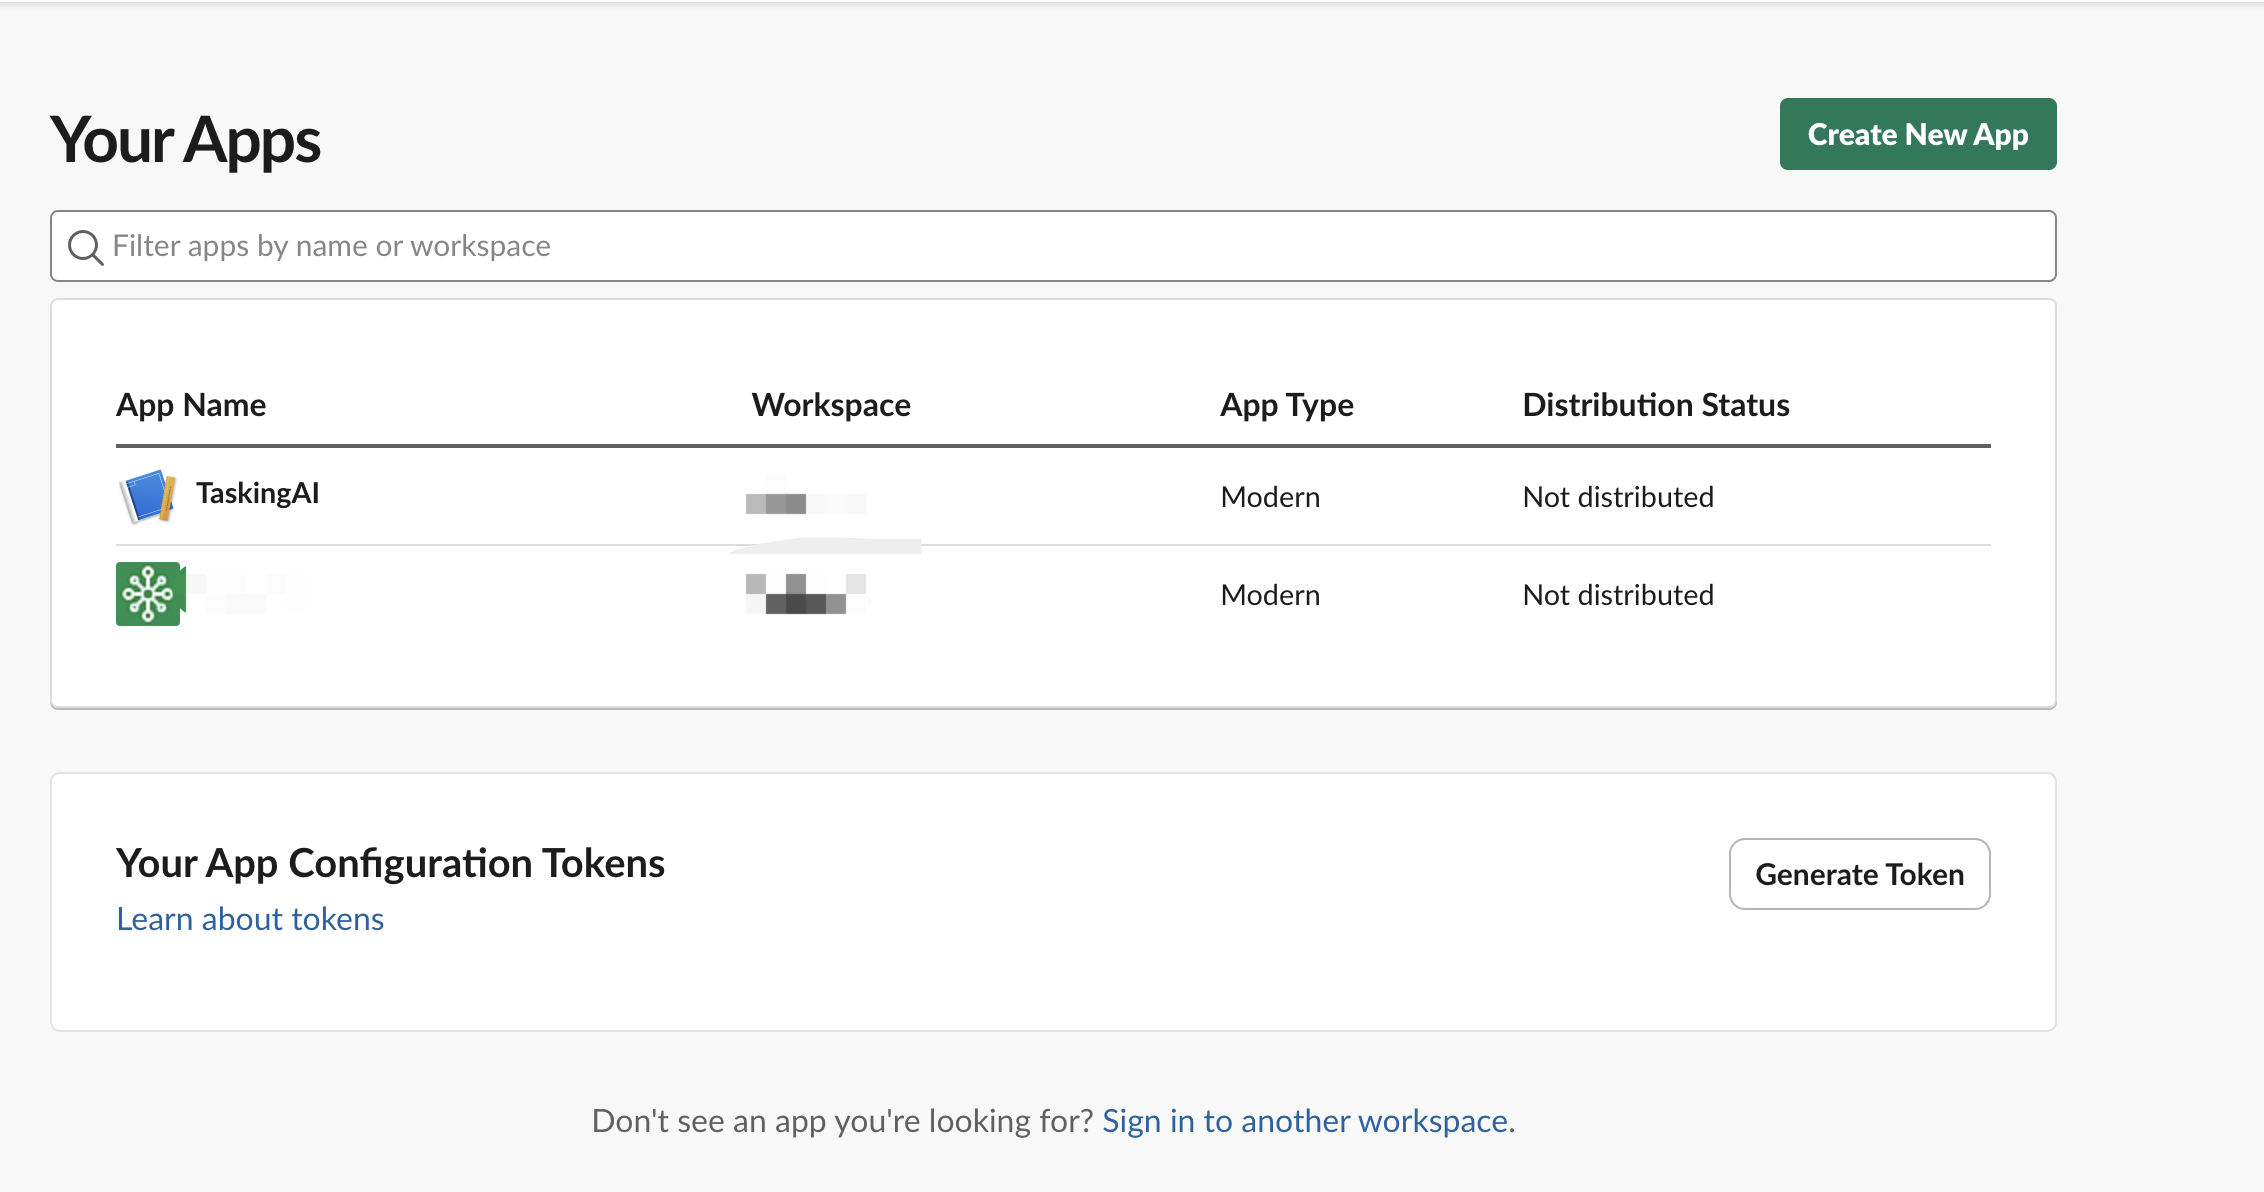
- Visit your Slack App console at https://api.slack.com/apps.
- Click the
Create New Appbutton on the top right.
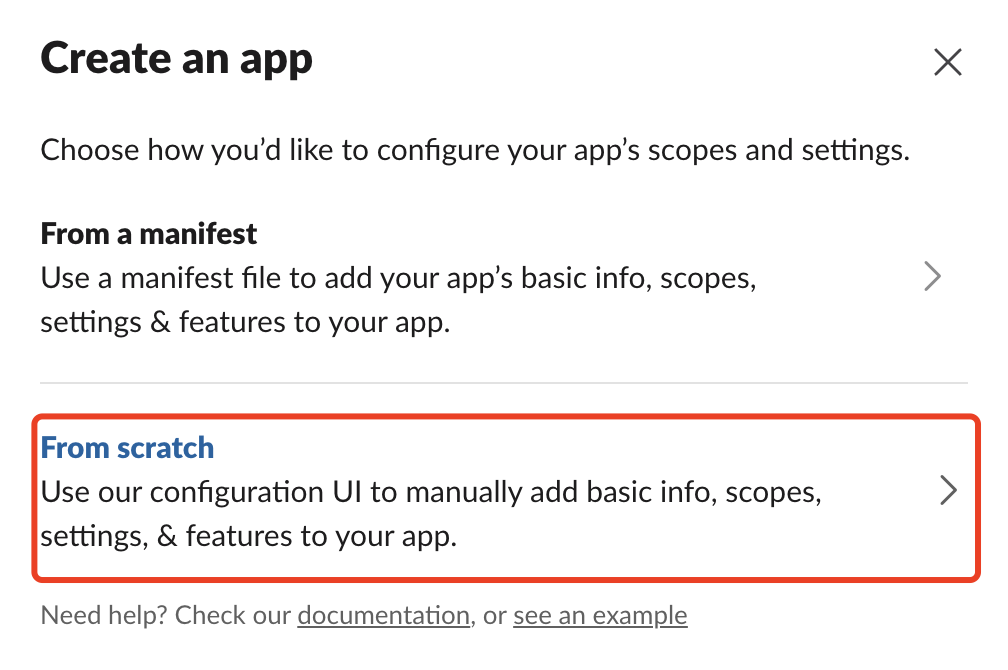
- Select
From scratchas creation method, then enter anApp Nameand select your target workspace.
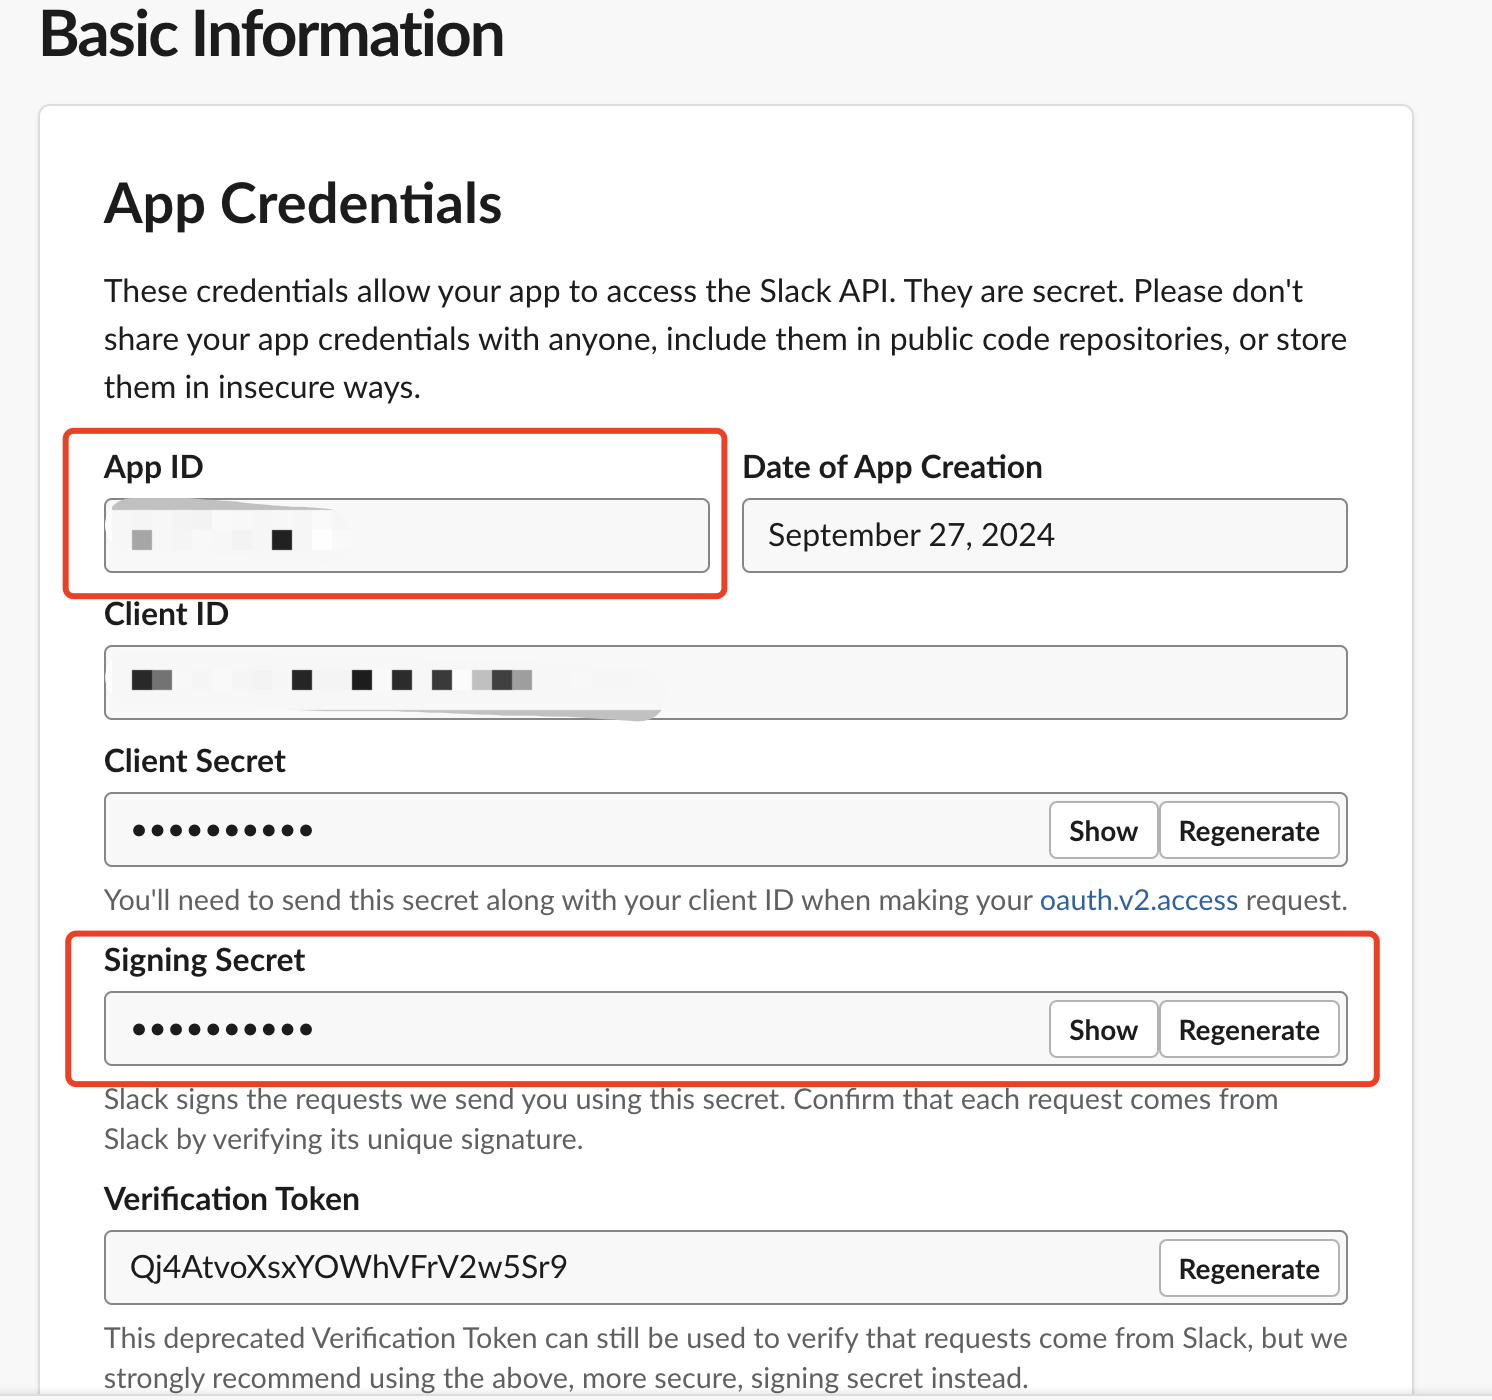
- After successfully creating the application, you will be redirected to the app's configuration page. In the basic information section, you can find the
App IDandSigning Secretof your app. Keep these values safe as you will need them later.
Step2: Add bot permissions
To allow your app to send and receive messages in your Slack workspace, you need to add the necessary permissions to your app. To add permissions, follow these steps:
- In the left sidebar, click the
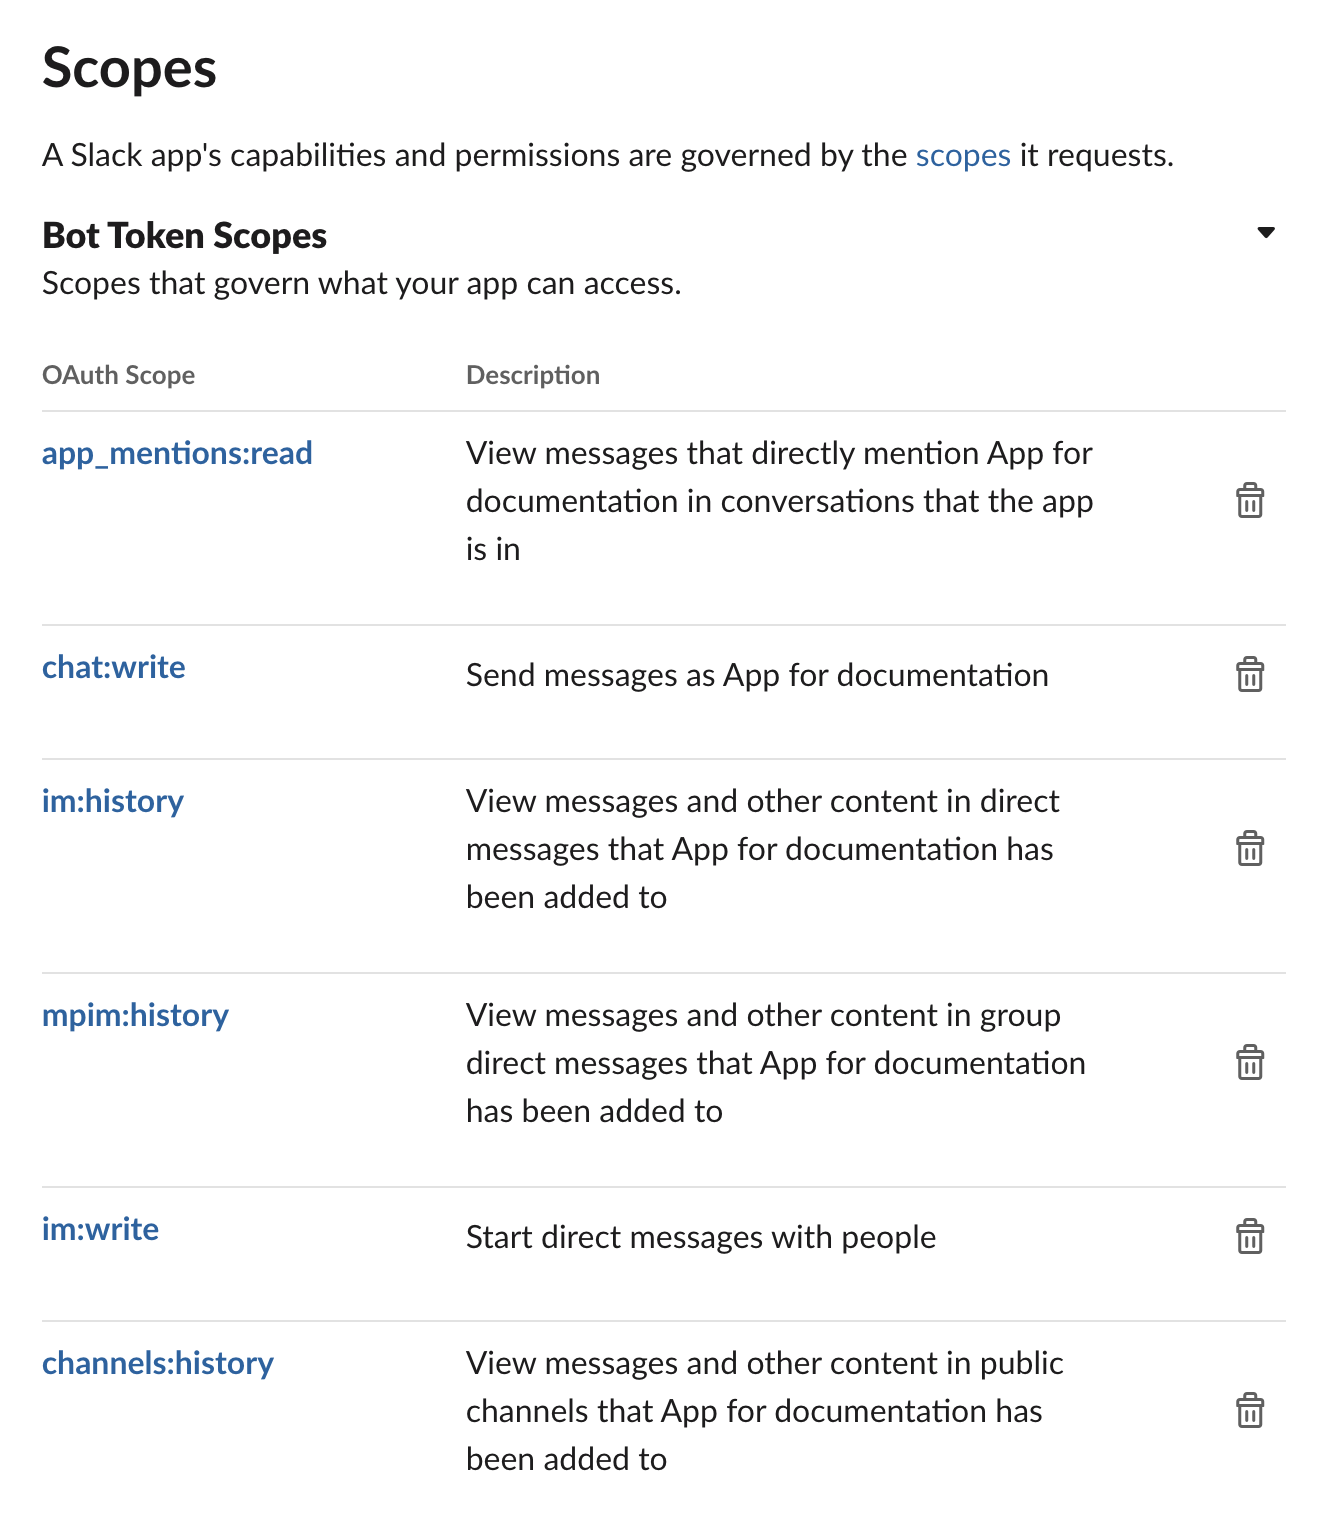
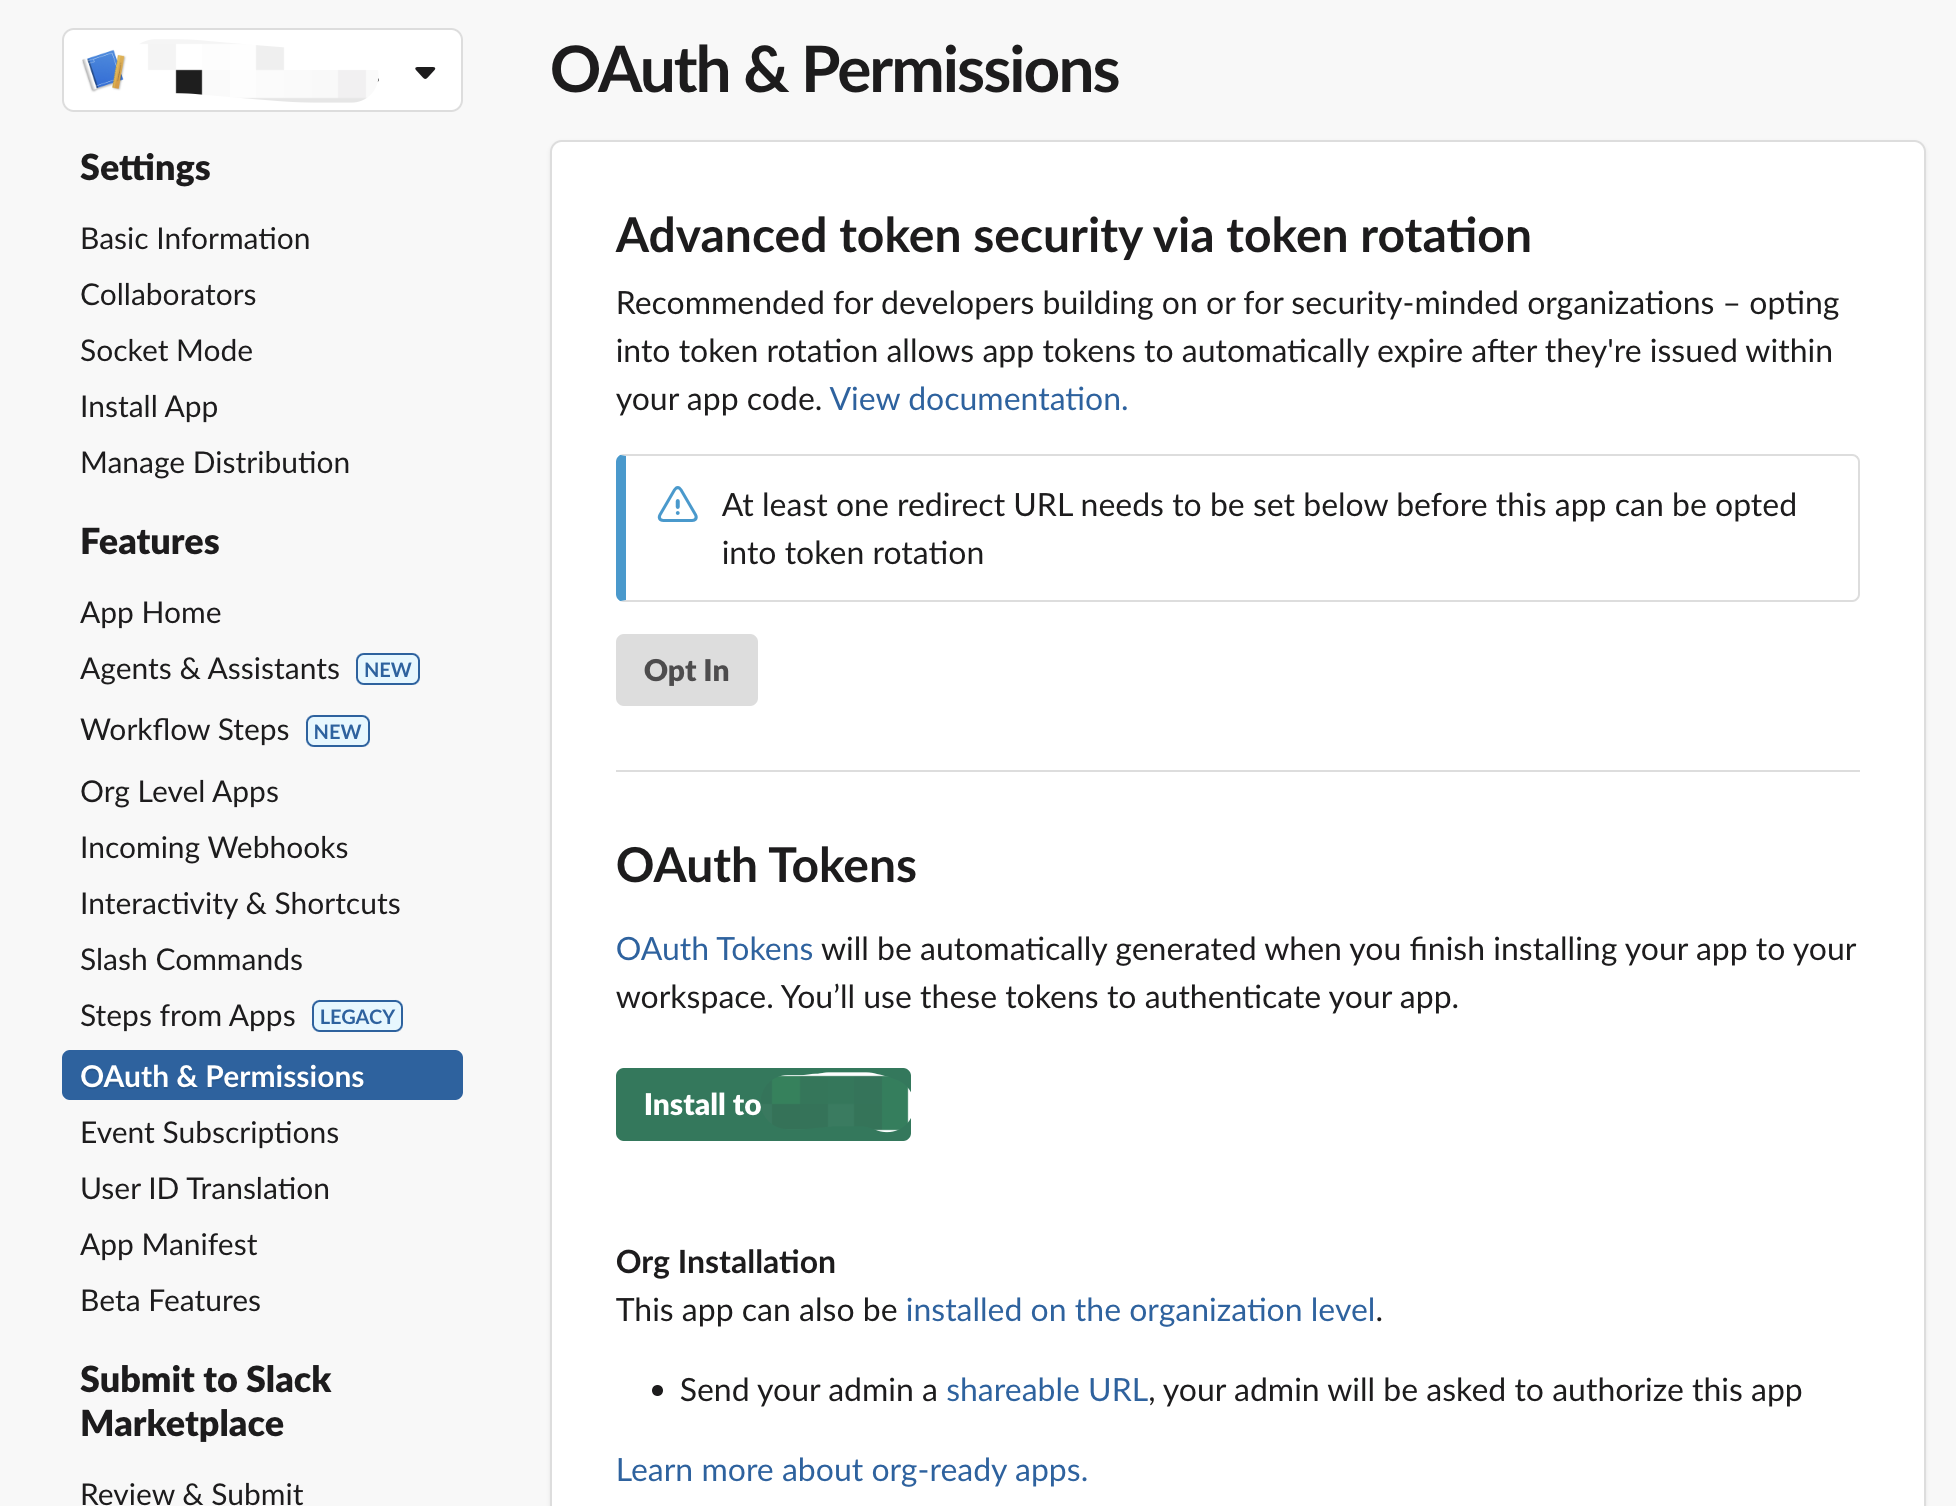
OAuth & Permissionstab. - Scroll down to the
Scopessection, and add the following bot token scopes:app_mentions:readchat:writeim:historyim:readim:writempim:historychannels:history
- Stay under the
OAuth & Permissionstab, and click theInstall to Workspacebutton underOAuth Tokensto install the app to your workspace.
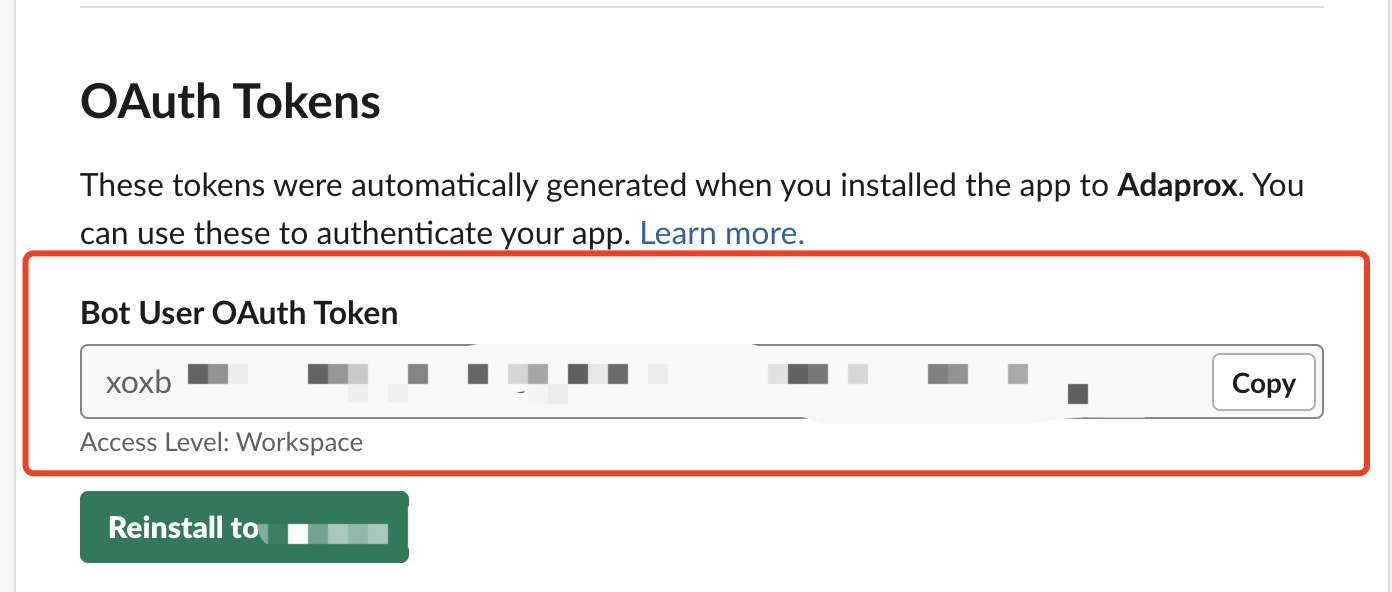
- After installing the app to your workspace, you will be able to see an
OAuth Access Tokenwhich starts withxoxb-. Keep this token safe as you will need it later.
Step 3: Configure the Slack Integration in TaskingAI
After the previous steps, you are ready to configure your Slack integration on TaskingAI platform.
- Log in to TaskingAI console, and navigate to the
Applicationstab underWorkspace. - Click on the application you want to integrate with Slack.
- On the tab selection bar on the top, click on the
Channelstab. - Select
Slackand provide the necessary information, includingApplication ID,Signing Secret, andBot User Auth Tokenyou obtained from previous steps. - Click
Activateafter filling in the information.
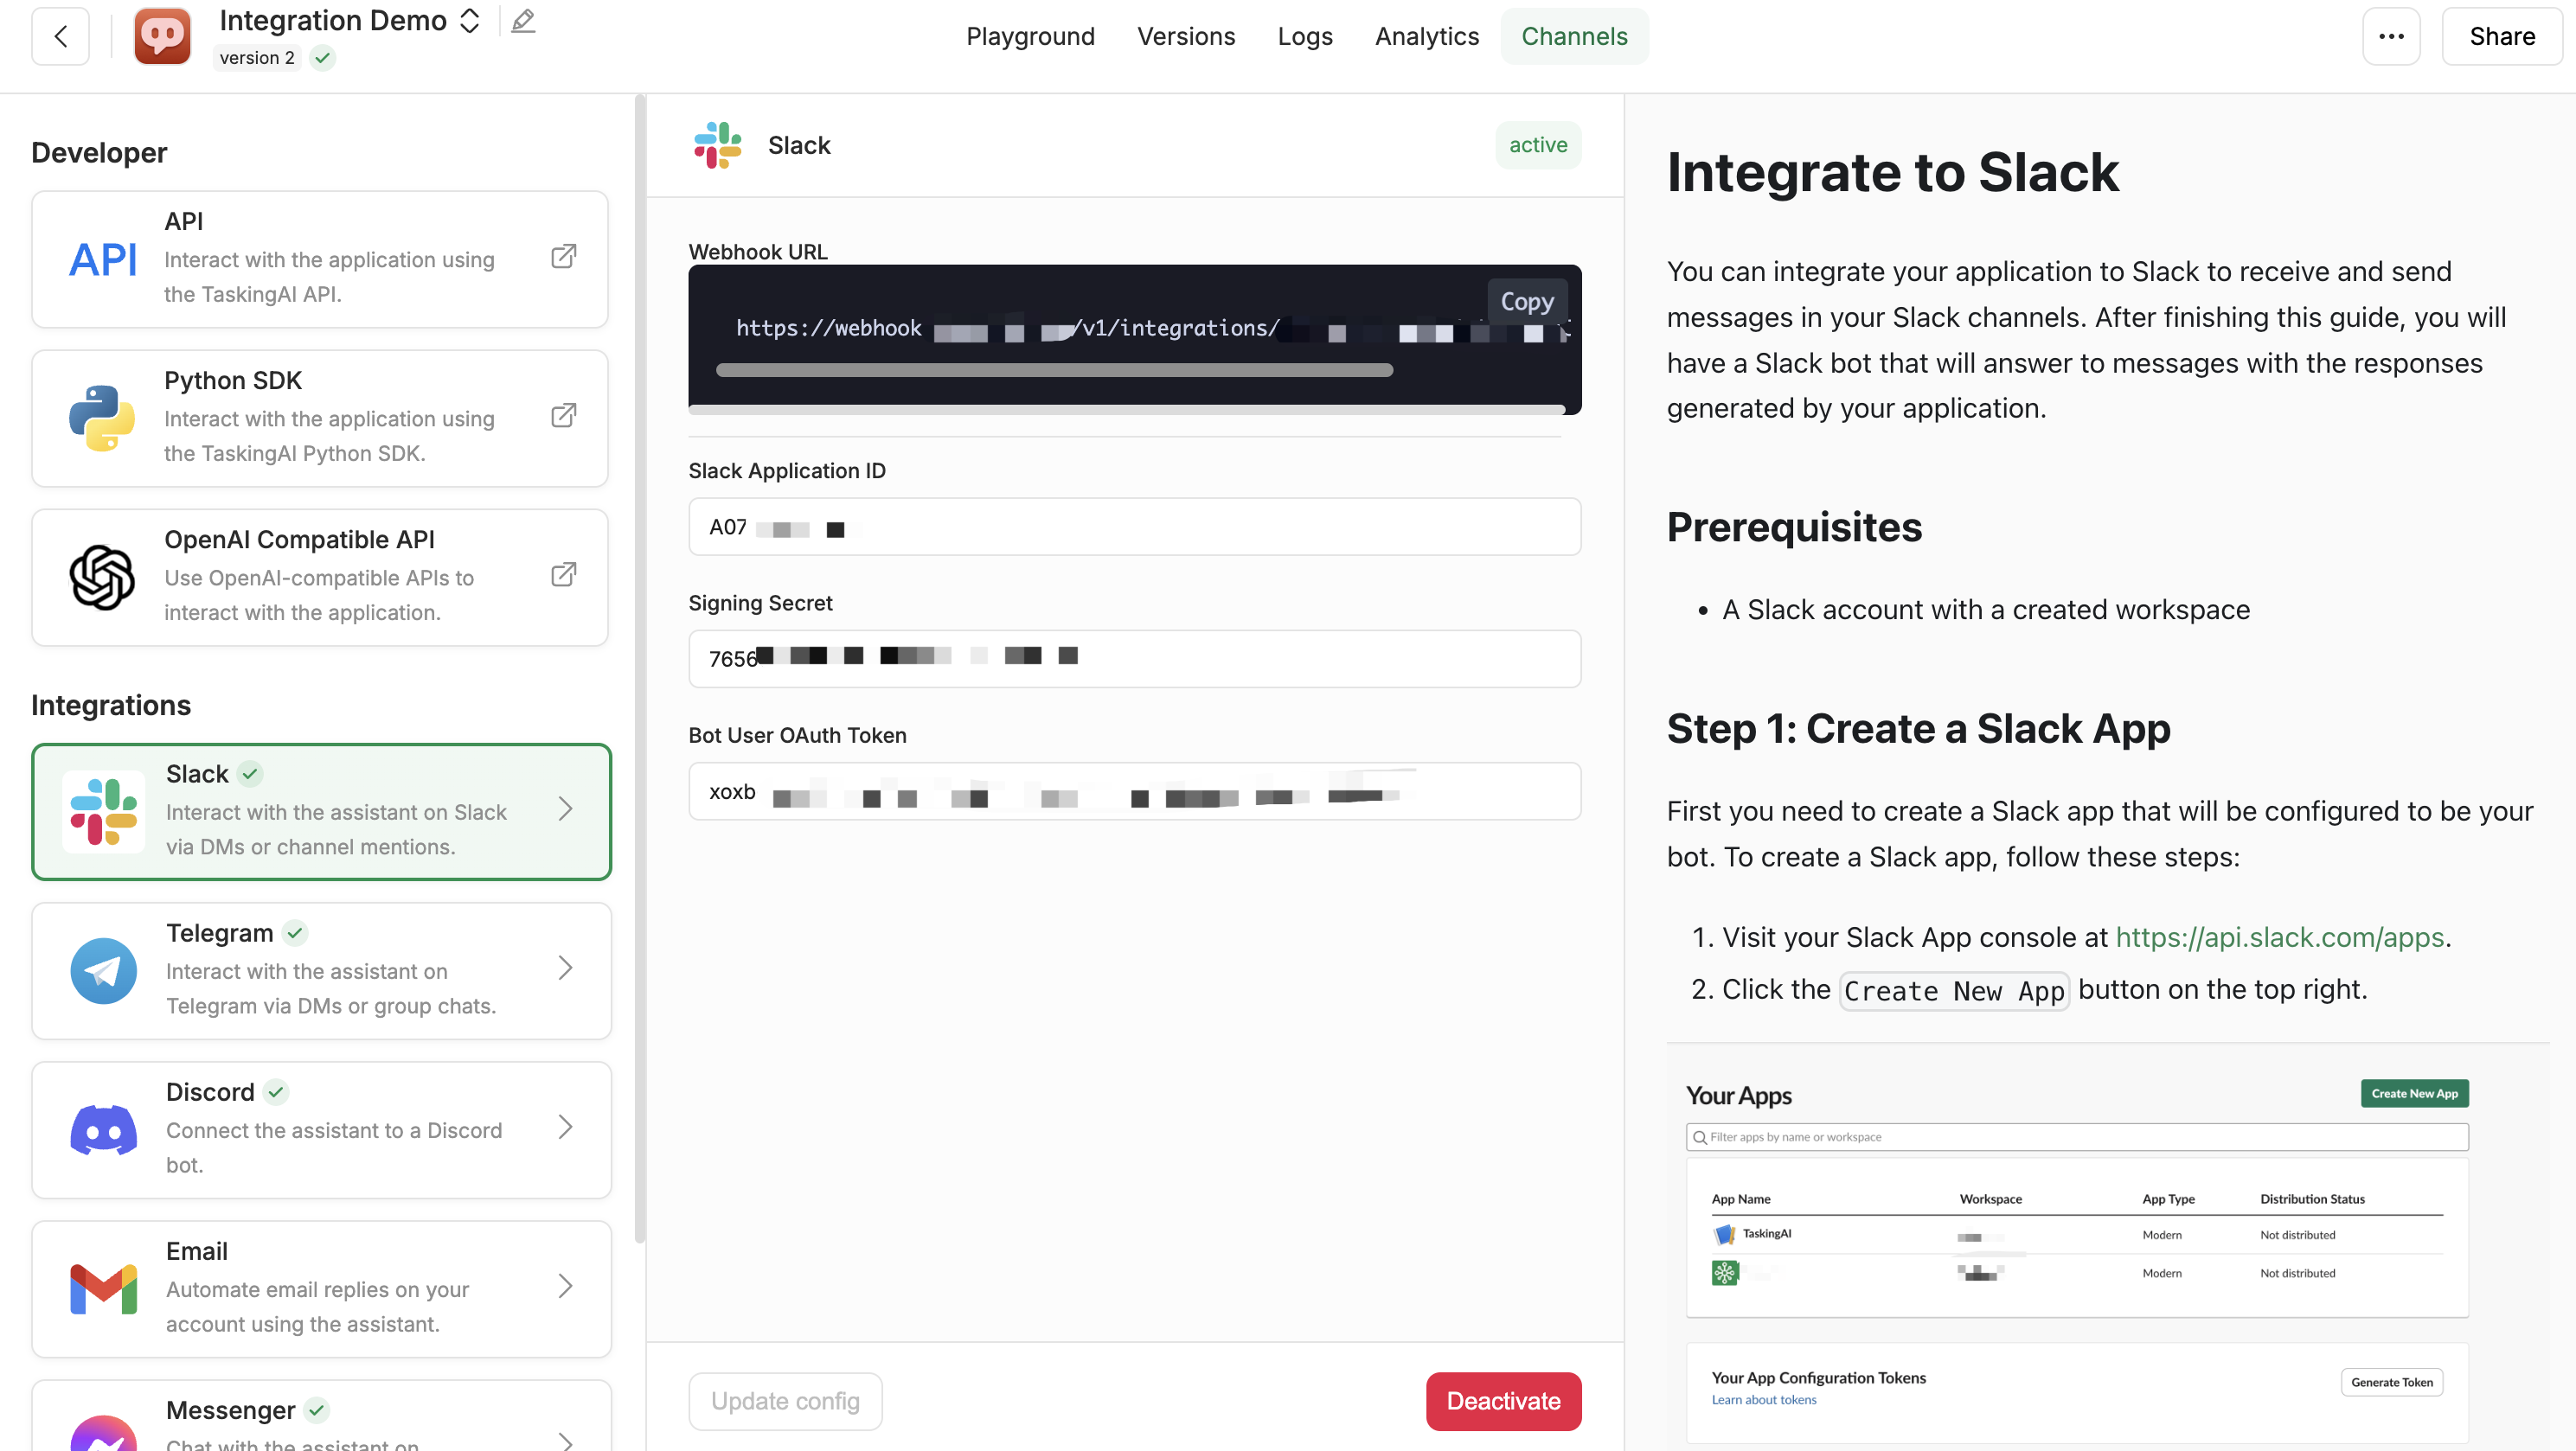
On the top of the configuration, a Webhook Url is displayed. You will need this URL to register a webhook on Slack in the next step.
Step 4: Register webhook on Slack
To receive messages from Slack to your TaskingAI application, you need to register a webhook URL in your Slack app. To register a webhook, follow these steps:
- Go back to your application on Slack, and navigate to
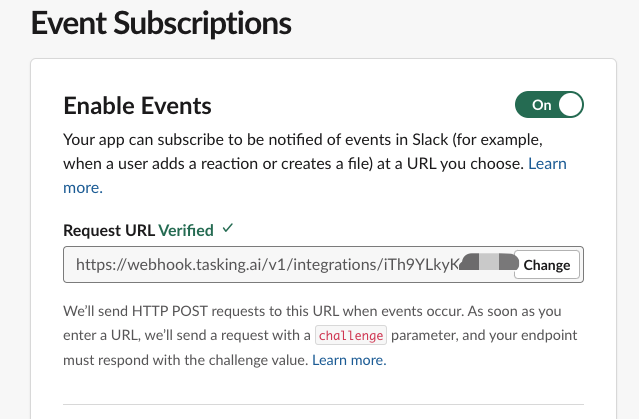
Event Subscriptiontab. - Turn on the
Enable Eventstoggle, and enter the URL of your TaskingAI application in theRequest URLfield. You can find the URL in the Slack integration configuration on TaskingAI Platform, as shown in the previous section.
- expand the
Subscribe to bot eventssection, and add the following bot events:app_mentionmessage.im
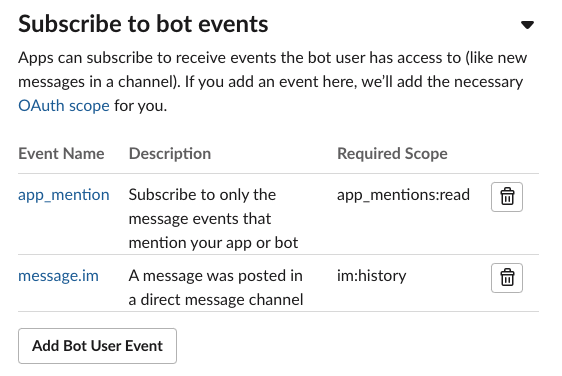
- After adding the events, click the
Save Changesbutton to save the webhook configuration.
Step 5: Allow direct messages to the bot (Optional)
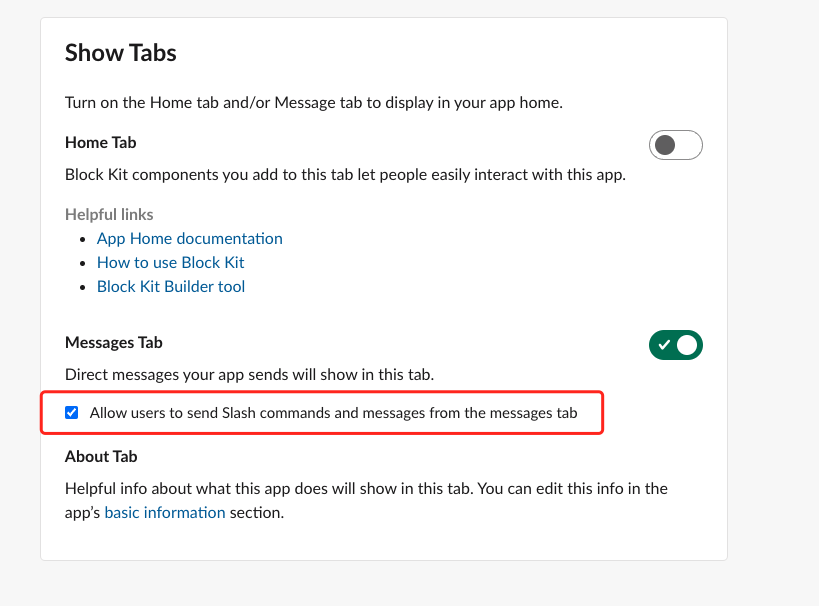
By default, the bot will only respond to messages in accessible channels that mention the bot. If you want the bot to respond to direct messages, please visit App Home in your Slack app settings and scroll down to Show Tabs section, and enable the Allow users to send Slash commands and messages from the messages tab option.
Step 6: Test the Integration
After completing the previous steps, you can test the integration by mentioning your Slack bot in a channel. The bot should respond with the generated response from your TaskingAI application.

If you also allowed direct messages to the bot as described in Step 5, you can also send a direct message to the bot to receive a response.